


概述
kratos是b站开源的go的微服务框架。目前已经有17k+的star。作为主流的开源微服务框架,具有多种工具链来方便微服务项目的开发。
环境搭建
在开始搭建开发环境之前首先确保安装好go语言最新版本、以及protoc、protoc-gen-go这两个grpc代码生成的工具。
1、安装kratos工具
go install github.com/go-kratos/kratos/cmd/kratos/v2@latest
2、安装make工具
因为kratos是使用make作为打包批处理运行的工具,所以需要安装make。
下载链接:http://gnuwin32.sourceforge.net/packages/make.htm
选择Complete package, except sources版本,下载并安装。

安装完成之后,需要将bin目录添加到windows的系统Path环境变量中。
命令行输入make,不提示命令不存在即安装完成。
创建项目
通过 kratos 命令创建项目模板:
kratos new helloworld
使用 -r 指定源
国内拉取失败可使用gitee源
kratos new helloworld -r https://gitee.com/go-kratos/kratos-layout.git
亦可使用自定义的模板
kratos new helloworld -r xxx-layout.git
同时也可以通过环境变量指定源
KRATOS_LAYOUT_REPO=xxx-layout.gitkratos new helloworld
使用 -b 指定分支
kratos new helloworld -b main
以下使用kratos new helloworld创建项目:
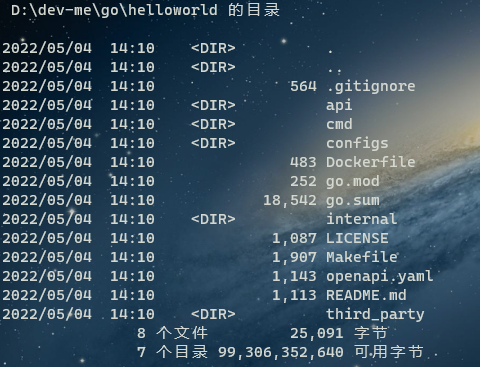
项目结构:
├─api
│  └─helloworld
│      └─v1
├─cmd
│  └─helloworld
├─configs
├─internal
│  ├─biz
│  ├─conf
│  ├─data
│  ├─server
│  └─service
└─third_party
    ├─errors
    ├─google
    │  ├─api
    │  └─protobuf
    └─validate
完整的文件结构:
D:.
│  .gitignore
│  Dockerfile
│  go.mod
│  go.sum
│  LICENSE
│  Makefile
│  openapi.yaml
│  README.md
│
│
├─api
│  └─helloworld
│      └─v1
│              error_reason.pb.go
│              error_reason.proto
│              greeter.pb.go
│              greeter.proto
│              greeter_grpc.pb.go
│              greeter_http.pb.go
│
├─cmd
│  └─helloworld
│          main.go
│          wire.go
│          wire_gen.go
│
├─configs
│      config.yaml
│
├─internal
│  ├─biz
│  │      biz.go
│  │      greeter.go
│  │      README.md
│  │
│  ├─conf
│  │      conf.pb.go
│  │      conf.proto
│  │
│  ├─data
│  │      data.go
│  │      greeter.go
│  │      README.md
│  │
│  ├─server
│  │      grpc.go
│  │      http.go
│  │      server.go
│  │
│  └─service
│          greeter.go
│          README.md
│          service.go
│
└─third_party
    │  README.md
    │
    ├─errors
    │      errors.proto
    │
    ├─google
    │  ├─api
    │  │      annotations.proto
    │  │      client.proto
    │  │      field_behavior.proto
    │  │      http.proto
    │  │      httpbody.proto
    │  │
    │  └─protobuf
    │          descriptor.proto
    │
    └─validate
            README.md
            validate.proto
生成GRPC代码
添加 Proto 文件
kratos-layout 项目中对 proto 文件进行了版本划分,放在了 v1 子目录下
kratos proto add api/helloworld/demo.proto
生成的proto文件:
syntax = "proto3";

package api.helloworld;

option go_package = "helloworld/api/helloworld;helloworld";
option java_multiple_files = true;
option java_package = "api.helloworld";

service Demo {
    rpc CreateDemo (CreateDemoRequest) returns (CreateDemoReply);
    rpc UpdateDemo (UpdateDemoRequest) returns (UpdateDemoReply);
    rpc DeleteDemo (DeleteDemoRequest) returns (DeleteDemoReply);
    rpc GetDemo (GetDemoRequest) returns (GetDemoReply);
    rpc ListDemo (ListDemoRequest) returns (ListDemoReply);
}

message CreateDemoRequest {}
message CreateDemoReply {}

message UpdateDemoRequest {}
message UpdateDemoReply {}

message DeleteDemoRequest {}
message DeleteDemoReply {}

message GetDemoRequest {}
message GetDemoReply {}

message ListDemoRequest {}
message ListDemoReply {}
生成 Proto 代码
可以直接通过 make 命令生成
make api
或使用 kratos cli 进行生成
kratos proto client api/helloworld/demo.proto
会在proto文件同目录下生成:
api/helloworld/demo.pb.go
api/helloworld/demo_grpc.pb.go
注意 http 代码只会在 proto 文件中声明了 http 时才会生成
api/helloworld/demo_http.pb.go
生成http代码需要安装:protoc-gen-go-http工具go get -u github.com/lazada/protoc-gen-go-http,需要自己进行编译安装。
生成一些http代码时有问题,推荐将Makefile的--go-http_out=paths=source_relative:./api \删掉。
第一次生成推荐使用kratos proto client api/helloworld/demo.proto会安装一些基础的工具。
生成 Service 代码
通过 proto文件,可以直接生成对应的 Service 实现代码:
使用 -t 指定生成目录
kratos proto server api/helloworld/demo.proto -t internal/service
输出:internal/service/demo.go
package service

import (
    "context"

    pb "helloworld/api/helloworld"
)

type DemoService struct {
    pb.UnimplementedDemoServer
}

func NewDemoService() *DemoService {
    return &DemoService{}
}

func (s *DemoService) CreateDemo(ctx context.Context, req *pb.CreateDemoRequest) (*pb.CreateDemoReply, error) {
    return &pb.CreateDemoReply{}, nil
}
func (s *DemoService) UpdateDemo(ctx context.Context, req *pb.UpdateDemoRequest) (*pb.UpdateDemoReply, error) {
    return &pb.UpdateDemoReply{}, nil
}
func (s *DemoService) DeleteDemo(ctx context.Context, req *pb.DeleteDemoRequest) (*pb.DeleteDemoReply, error) {
    return &pb.DeleteDemoReply{}, nil
}
func (s *DemoService) GetDemo(ctx context.Context, req *pb.GetDemoRequest) (*pb.GetDemoReply, error) {
    return &pb.GetDemoReply{}, nil
}
func (s *DemoService) ListDemo(ctx context.Context, req *pb.ListDemoRequest) (*pb.ListDemoReply, error) {
    return &pb.ListDemoReply{}, nil
}
运行项目
如子目录下有多个项目则出现选择菜单kratos run
$ kratos run
INFO msg=config loaded: config.yaml format: yaml
INFO msg=[gRPC] server listening on: [::]:9000
INFO msg=[HTTP] server listening on: [::]:8000
成功启动http服务和grpc服务
curl http://localhost:8000
404 page not found
总结
总的来说kratos上手使用还比较轻松,虽然涉及的工具比较多,但是按照官方文档一步步都可以顺利走下来。
接下来就行研究kratos的目录结构以及编码规范。
参考
版权声明
 本文章由作者“衡于墨”创作,转载请注明出处,未经允许禁止用于商业用途
 闽ICP备19015193号-1
评论区#
还没有评论哦,期待您的评论!
引用发言